Rowing Cardio
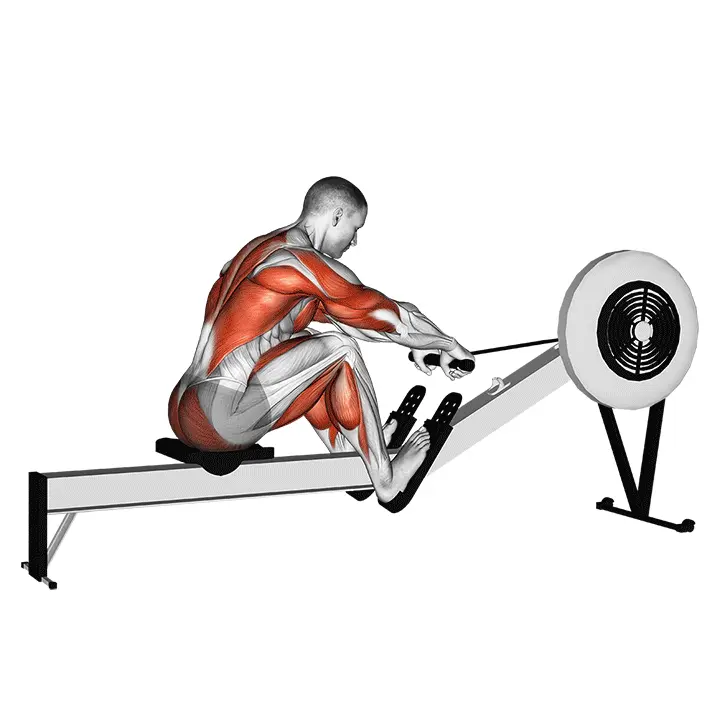
Rowing machine exercise is an effective full-body endurance movement that particularly targets the back, legs, and core. The exercise improves your aerobic capacity, rhythm, and muscular endurance while being joint-friendly.
AI Analysis
Required equipment
Why Rowing Cardio?
Rowing is an excellent choice when you are looking for an effective and full-body endurance workout. It is one of the few forms of exercise that activates almost all major muscle groups in the body – from the legs to the upper back and arms, not forgetting the important stabilizing muscles of the core. This makes rowing an incredibly time-saving and versatile workout that develops both strength and endurance simultaneously. Rowing machine exercise is particularly effective at improving your aerobic capacity, meaning you will perform better in daily activities and other physical performances. Its rhythmic nature also helps develop body control and coordination. Best of all, rowing is a joint-friendly activity, making it an excellent option for those with joint issues or those who want to avoid impact-type stress. It is a safe and effective alternative for both beginners and more experienced exercisers looking for a varied and challenging workout. With it, you can efficiently burn calories, build muscular endurance, and improve cardiovascular fitness.
Benefits
Effectively improves aerobic capacity.
Increases muscular endurance throughout the body.
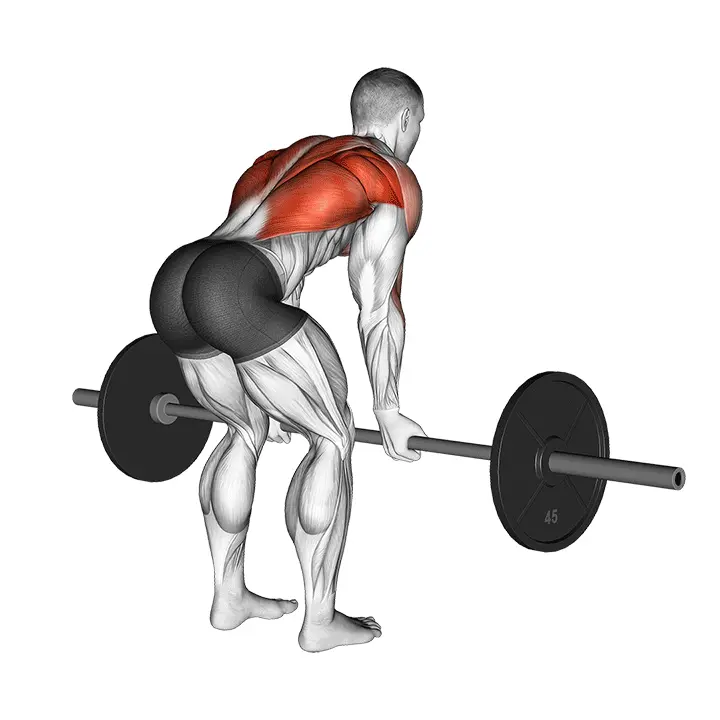
Strengthens the upper back, legs, and core.
Develops rhythm and coordination.
Saves joints due to minimal impact.
Activates a wide range of body muscles.
Enhances calorie consumption.
Muscle groups
Primary
- upper-back8
- upper-back8
- quadriceps7
- quadriceps7
Secondary
- hamstring6
- hamstring6
- gluteal7
- gluteal7
- biceps5
- biceps5
- forearm3
- forearm3
- trapezius4
- trapezius4
- deltoids3
- deltoids3
- calves3
- calves3
Stabilizers
- lower-back5
- abs6
- obliques4
- obliques4
How to perform
Setup
- Adjust the foot straps so that the balls of your feet are in the center of the footplates and tighten the straps securely.
- Set the resistance to a suitable level (3-5 for beginners) and adjust the display to the desired metric (e.g., time, distance, or watts).
- Sit upright: hips in a neutral position, chest open, shoulders relaxed. Grip the handle with a slightly wider than shoulder-width grip, keeping your wrists neutral.
Execution
- Starting position (catch): knees bent, shins nearly vertical, body slightly leaning forward from the hips, arms straight.
- Push: begin generating power with your legs by pushing the machine away; keep your arms and back stable.
- Pull through: as your legs approach straight, continue the movement with a hip extension and pull the handle towards your sternum with your elbows moving back along your sides (end of the pull). The body leans slightly back with a neutral spine, avoiding hyperextension.
Coaching cues
- •Maintain a pulling rhythm: fast and powerful pull, calm recovery (about 1:2–1:3).
- •Keep a neutral back and active core; avoid rounding in the lower back and raising the shoulders.
Common mistakes
❌ Pulling too early with the arms
Why it's wrong: Many start pulling with their arms before completing the push with their legs. This unnecessarily strains the lower back and shoulders and does not utilize the tremendous power of the legs.
✓ Fix: Always start the movement with an explosive leg push. Only when the legs are extended should the arms and upper body follow.
❌ Rounded back
Why it's wrong: Especially during the recovery phase or at the end of the pull, the back can easily round. This weakens power transfer and increases the risk of injury to the lower back.
✓ Fix: Keep your back straight and engage your core throughout the movement. Imagine your navel pulling towards your spine. If necessary, adjust the resistance to a lighter setting to maintain good posture.
❌ Too fast a pace
Why it's wrong: Rowing too quickly without control often leads to poor technique and makes the workout less effective, as the muscles do not have time to work properly.
✓ Fix: Focus on a controlled, steady pace. A rule of thumb is that the recovery phase should be about twice as long as the pulling phase. For example, 1 second pull, 2 seconds recovery.
Frequently asked questions
How often should you row?
You can row 2-4 times a week depending on your goals and other training programs. For beginners, 2-3 times a week is a good start to allow the body to adapt to the movement and for the muscles to recover.
What is the right resistance on the rowing machine?
Start with a lighter resistance and focus on technique. Once you have mastered the technique, you can increase the resistance to a challenging level while still maintaining a good rhythm and controlled movement. Resistance is personal and depends on your goals.
Can rowing help with weight loss?
Absolutely! Rowing is an effective full-body workout that burns a lot of calories and improves metabolism. Regular rowing workouts combined with a balanced diet are an excellent way to support weight management and loss.
What muscles does rowing develop the most?
Rowing broadly engages the body's muscles. Primarily, it strengthens the legs (quadriceps, hamstrings, glutes), upper back, shoulders, arms (biceps, triceps), and core stabilizing muscles. It is truly a comprehensive form of exercise.
Safety tips
- Ensure that the foot supports are securely attached and at the right height so that your feet stay in place throughout the movement.
- Keep your back straight and your core active throughout the movement to avoid lower back strain.
- Always start with a light warm-up (5-10 min) and finish with a cool-down and light stretching.
- Listen to your body; if you feel pain, stop the exercise and check your technique or rest.
- Do not release your grip on the handle during the pull, and keep your wrists straight to avoid overstraining them.
Tags

Train smarter with AI coaching
Tsemppi's AI gives you exact weights and reps for every workout. Progress every single session.
Start your free 7-day trial✨ Limited spots available • No credit card required