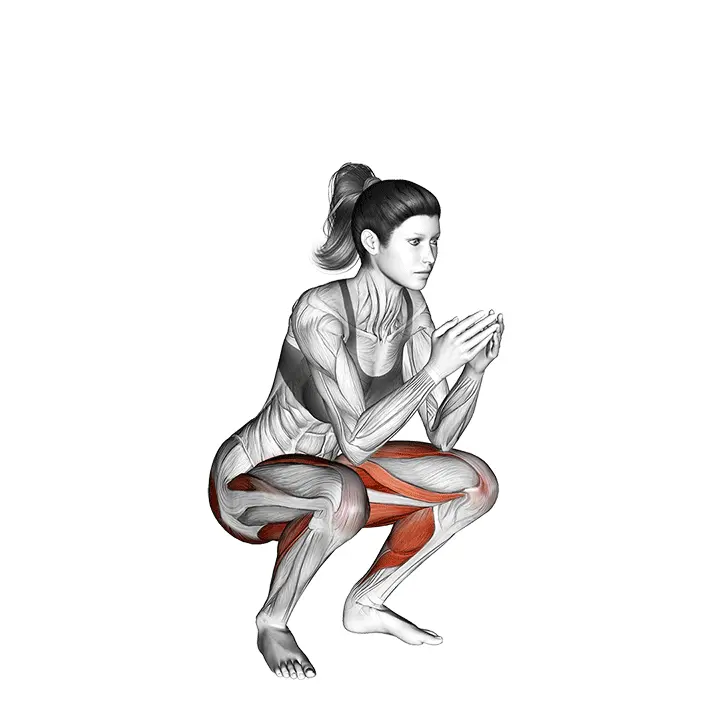
Dumbbell Goblet Squat
The Dumbbell Goblet Squat is a variation of the goblet squat that corrects thigh alignment and improves hip and knee control. This movement strengthens the quadriceps and glutes while teaching how to keep the knees aligned with the direction of the toes.
AI Analysis
Required equipment
Why Dumbbell Goblet Squat?
The Dumbbell Goblet Squat is an excellent foundational exercise that effectively challenges and develops the lower body muscles. This squat variation is particularly valuable as it focuses on improving thigh alignment and teaching optimal hip and knee control, which can be a challenge for many in traditional squats. By holding the dumbbell in front of the chest, the movement helps keep the upper body upright, allowing for a deeper squat and more effective activation of the quadriceps and glutes. At the same time, it trains core support and posture. This movement is great for beginners who want to learn the correct squat technique safely, as well as for more experienced trainers as a warm-up or additional exercise. It is an excellent way to strengthen the legs and glutes without the high mobility and technical challenges required for barbell squats. The goblet squat helps correct common technique errors, such as knees caving inward or the back rounding, forcing the body into a more natural and stable position. It helps develop functional strength that carries over into daily life and sports, while also improving body control and preventing injuries. It is a simple yet extremely effective movement that provides a solid foundation for all lower body training.
Benefits
Effectively strengthens the quadriceps and glutes.
Improves knee and hip control.
Guides proper squat technique.
Increases core stability.
Develops functional strength for daily life.
Promotes better posture and body control.
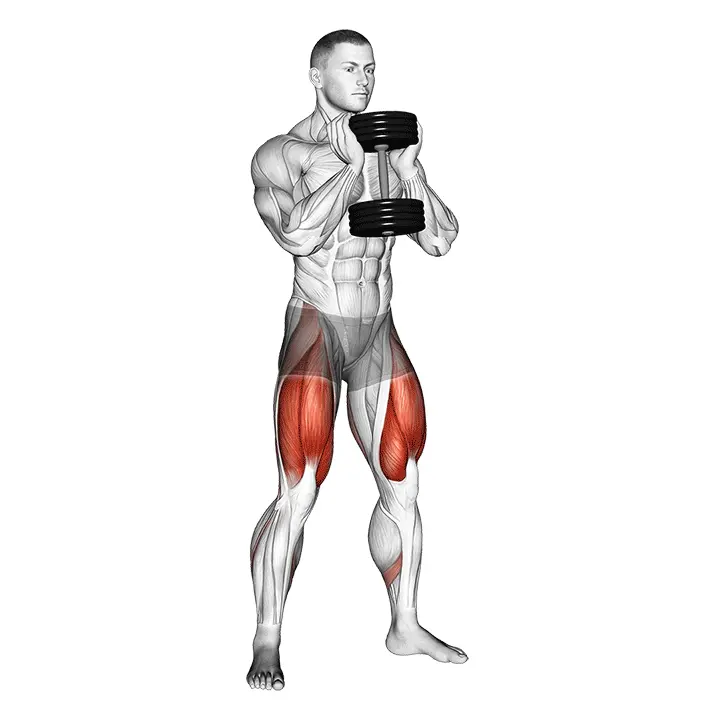
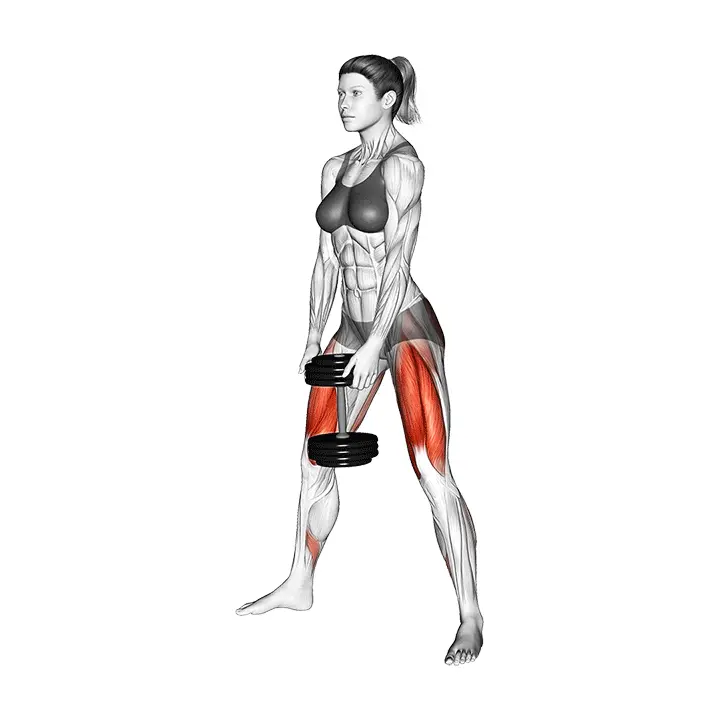
Muscle groups
Primary
- quadriceps10
- quadriceps10
Secondary
- gluteal8
- gluteal8
Stabilizers
- hamstring5
- hamstring5
- adductors5
- adductors5
- abs6
- obliques4
- obliques4
- calves3
- calves3
- lower-back3
How to perform
Setup
- Stand with your feet about shoulder-width apart, toes slightly turned out (10–30°).
- Hold the dumbbell vertically in front of your chest with both hands in a cup grip (palms facing each other).
- Engage your core, keep your chest up, and shoulder blades slightly tucked. Find a neutral spine.
Execution
- Begin the movement by gently pushing your hips back and lowering into a squat until your thighs are at least parallel to the ground or as low as you can control.
- Keep your knees aligned with your feet; do not let them cave inward. Keep your heels on the ground and weight centered on the midfoot.
- Push up by driving through your feet, locking out the movement at the top by squeezing your glutes and maintaining core support throughout the movement.
Coaching cues
- •Think 'knees out – towards the toes' throughout the entire repetition.
- •Keep your elbows close to your body and the dumbbell tight against your chest to keep your upper body upright.
Common mistakes
❌ Knees cave inward
Why it's wrong: Weak hip abductors or poor body control can cause the knees to cave inward, which unevenly loads the knee joint and increases the risk of injury.
✓ Fix: Focus on pushing the knees outward in line with the toes throughout the movement. Imagine there is a rubber band between your thighs that you are stretching.
❌ Back rounds in the bottom position
Why it's wrong: Weak core, poor mobility, or too heavy a weight can lead to rounding of the back in the bottom position, increasing the risk of lower back injury.
✓ Fix: Keep your chest up and back straight, imagining you are pulling your belly button towards your spine. If your back rounds, lighten the weight or improve your mobility.
❌ Squat is too shallow
Why it's wrong: Stiff hips or ankles can prevent a sufficiently deep squat, resulting in inadequate muscle activation and reduced effectiveness of the movement.
✓ Fix: Practice mobility and aim to descend low enough so that your thighs are at least parallel to the ground or slightly below, while maintaining good posture and keeping your heels on the ground.
Frequently asked questions
How deep should I squat in the goblet squat?
Aim to squat as deep as possible while keeping your back straight and heels on the ground. Ideally, your thighs should be at least parallel to the ground or slightly below. A deeper squat activates the glutes and hamstrings more effectively and promotes better mobility.
Can I do goblet squats without a dumbbell?
Yes, you can start with bodyweight squats to practice technique and mobility. However, the dumbbell adds resistance and its front load helps balance the movement, often making it easier to maintain an upright position and squat deeper, especially for beginners.
Is the goblet squat good for beginners?
Absolutely! The goblet squat is an excellent foundational exercise for beginners as it teaches proper squat technique and helps develop mobility safely. The front load of the dumbbell helps keep the upper body upright, which is often a challenge in traditional squats.
How do I choose the right weight for goblet squats?
Choose a weight that allows you to perform the desired number of repetitions with good technique. The last few repetitions should feel challenging, but you should not lose control or technique. Start with a lighter weight and gradually increase it as your technique stabilizes.
Safety tips
- Warm up thoroughly before starting the movement with dynamic stretches and light bodyweight squats.
- Always keep your back straight and chest up, avoiding rounding of the back, especially in the bottom position. Core support is key.
- Ensure your knees point in the same direction as your toes and do not cave inward. This protects the knee joints.
- Start with a light weight and focus on technique before adding load. Good technique should always be the priority.
- If you feel sharp pain in your knees or lower back, stop the movement immediately and check your technique or consult a professional.
Tags

Train smarter with AI coaching
Tsemppi's AI gives you exact weights and reps for every workout. Progress every single session.
Start your free 7-day trial✨ Limited spots available • No credit card required